Seasoning Carbon Steel
By Michael
Published October 19, 2021
Carbon steel is a lot like cast iron, in that thin layers of polymerized oil bond to the surface over time through a process known as seasoning.
With any new carbon steel pan, you want to make sure you get an initial layer of seasoning down before using it to cook.
This ensures that as you cook in it, the microscopic layer you are cultivating will improve, and your pan will become more non-stick over time.
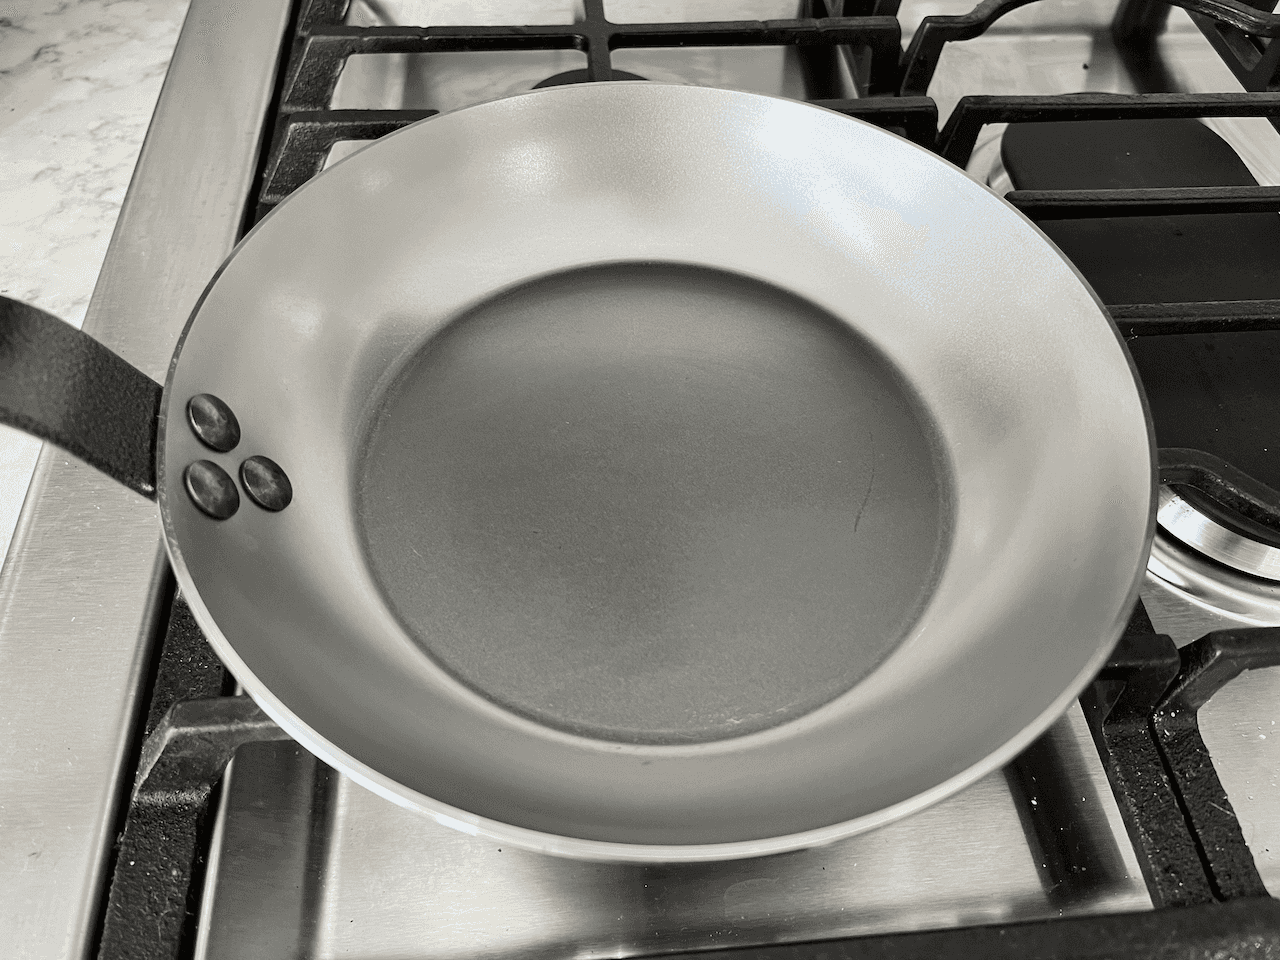
When I got my new De Buyer pan, I did some digging on the best way to season it. Because the handle on my pan is not oven safe for more than 10 minutes or so, I needed to find a good stove-top method.
All my research led me to what is commonly called the "America's Test Kitchen" or "Cook's Illustrated" method, which can be found here on the Cook's Illustrated website.
Here is my experience following it.
First, I unboxed my pan and gave it a good scrub with hot soapy water, and then hand dried it. I put this on the stove.
Next, I peeled a few potatoes. Since I had Yukon Golds and they aren't the biggest, I probably peeled four of them.
I put the potato peels in the pan, along with 1/3 cup oil and 2/3 cup salt, like Cook's Illustrated recommends. I used vegetable oil (which is soybean oil according to the nutrition label) and a mix of kosher and table salt, since they were within easy reach.
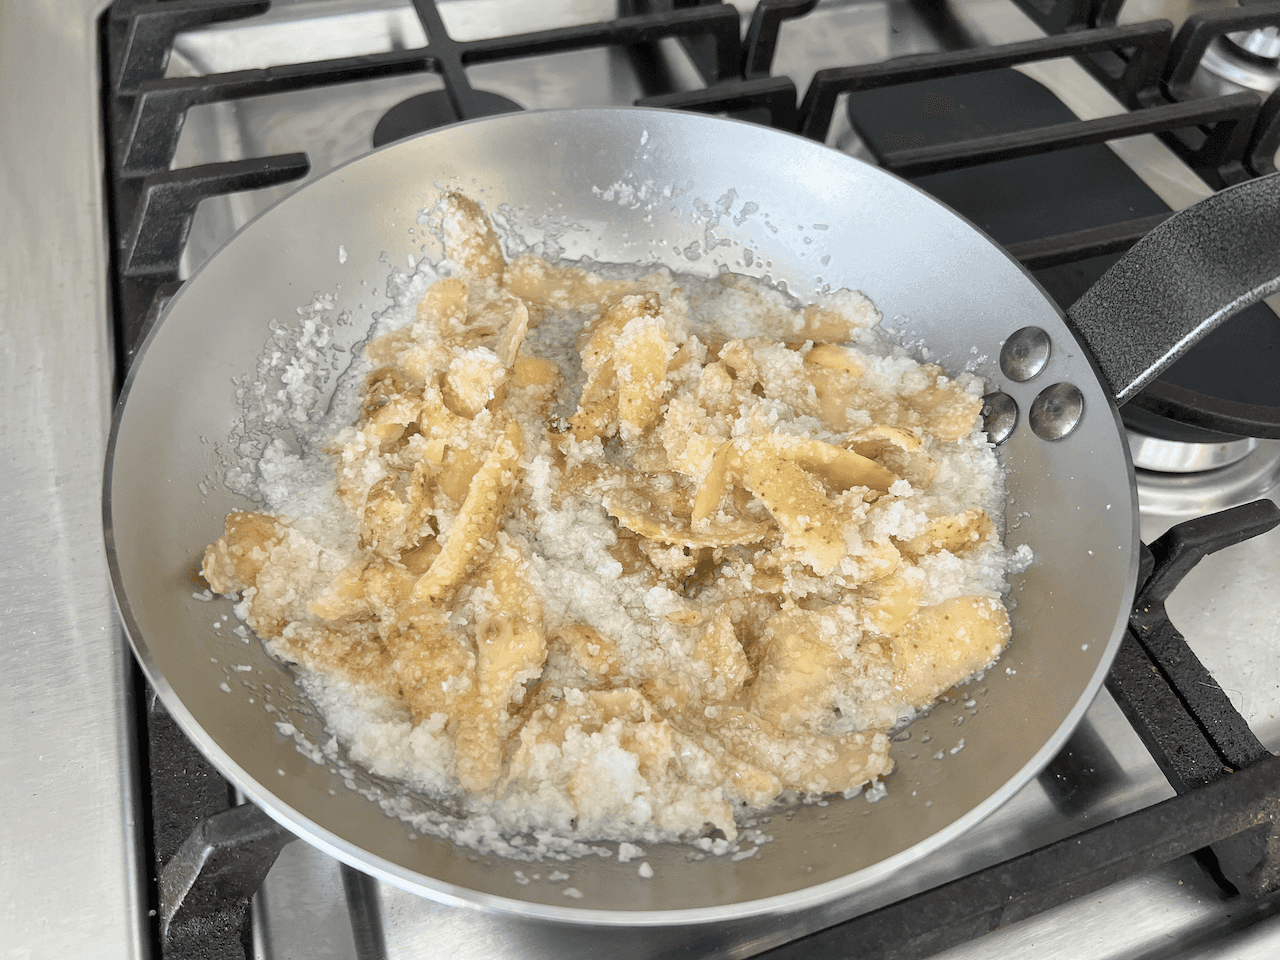
I then heated the pan over medium heat, stirring everything around with a wooden spoon. I made sure to swipe the oily peels all around the sides of the pan as well.
As I cooked the potato peels, the pan started picking up bronze hues, slowly at first, but more noticeable as time went on.
I cooked everything a little too much, which is fine. You're aiming for the peels to be a dark brown color, but mine were starting to burn and smell pretty acrid. It took about 15 minutes to get to this point.
I emptied the contents of the skillet and gave it a quick scrub in hot soapy water again. Then I hand dried it and returned it to a low flame on the stove top to make sure it was fully dried. I then gave it a really really light swab of vegetable oil using a paper towel to make sure it's protected from errant moisture in the air and in my kitchen.
Here is how it looked after the initial seasoning:
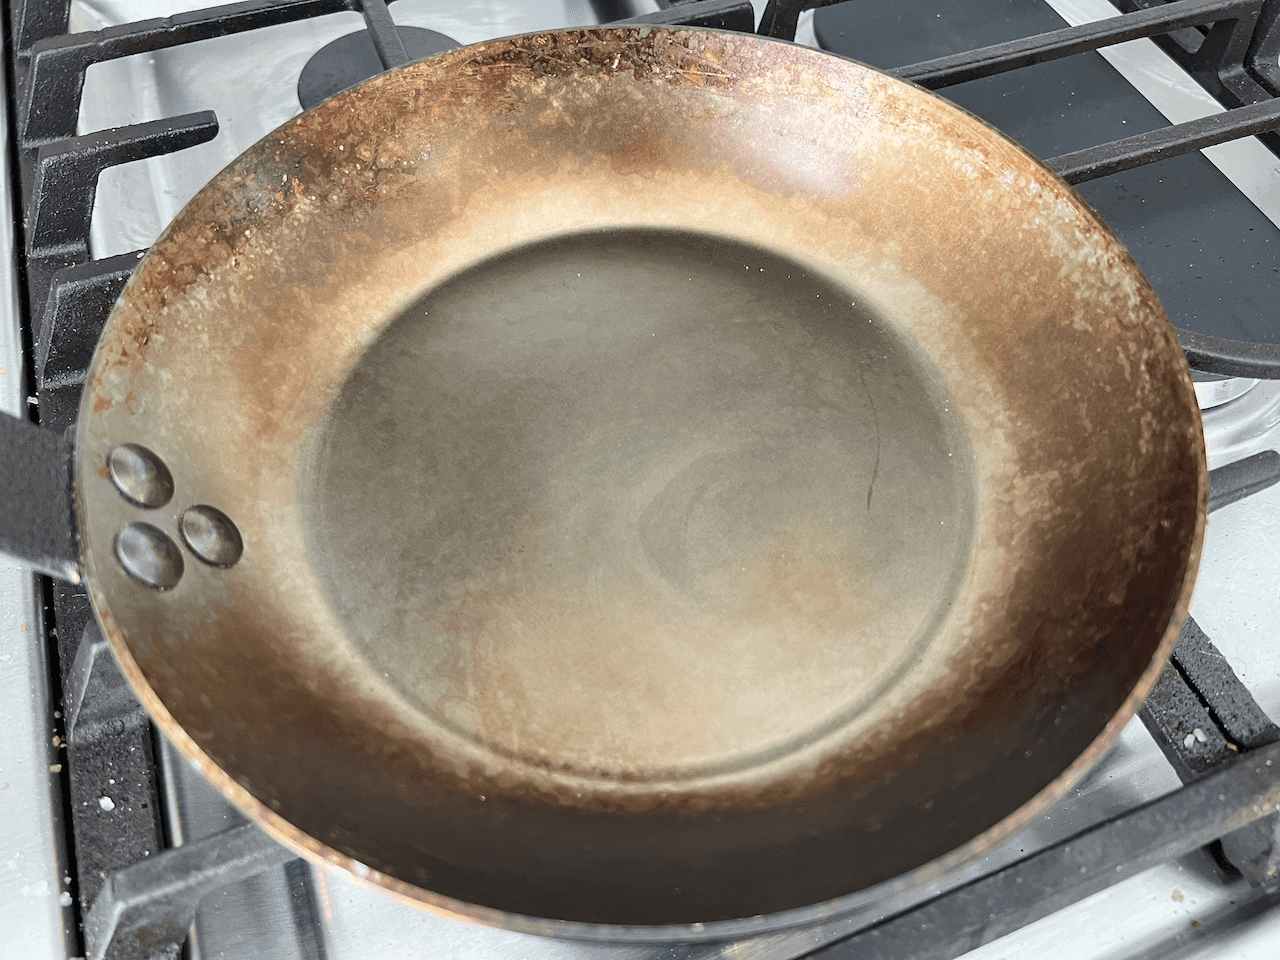
The patina that develops as the seasoning does looks really cool, and is unique to your pan like a finger print. It's okay that it isn't even all over, it's okay if things stick some time.
My recommendation is to use plenty of butter or oil when you cook for a while, to make sure things don't stick.
I was able to cook an egg in butter after my initial seasoning, and it did not stick at all. The pan already looks different from a short while ago, as you can see here:
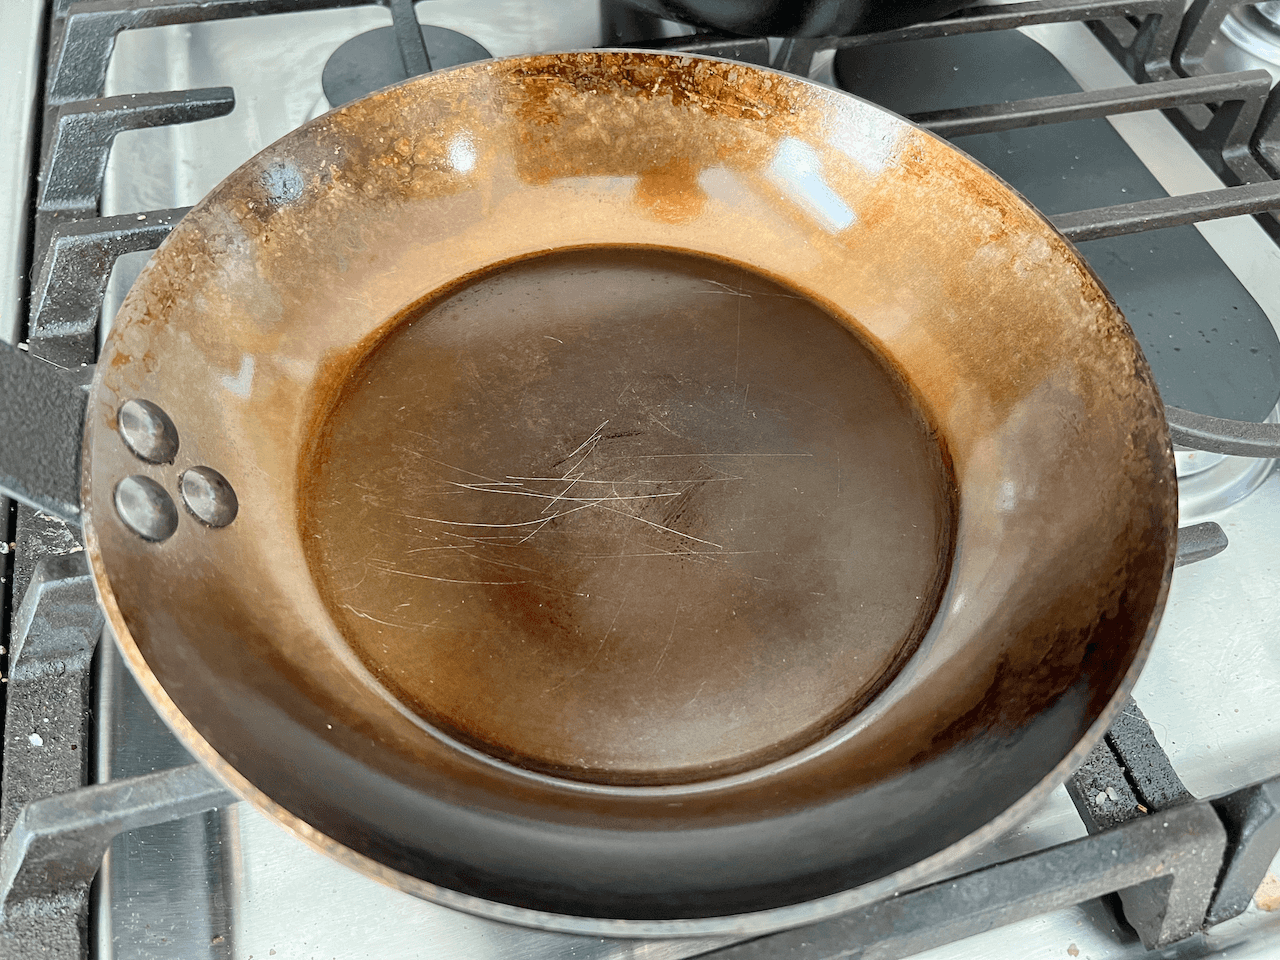
The best way to develop this non-stick surface is to keep cooking on it. This pan has been used a few times now, and it even looks different than before. This is okay, and each time it gets more protected and more non-stick.